Install and Configure Samba Server in Centos 7

Few days ago I was going for an overtime in office just to finish installing samba in a Centos 7 minimal for my working server. Two consecutive nights, samba didn’t install correctly after several tries. Third night came, I called a help from one of my bosses and wtf it was just a common mistake that I ignore that made the samba runs. Hahha! Poor me.
Samba is an open source, and free software suite that provides file and print services to the SMB/CIFS clients. It allows us to share files, folders, and printers between Linux server and Windows clients. Using Samba, we can setup a domain controller on Unix/Linux server, and integrate the Windows clients to the Domain controller.
Here’s a detailed step on how to setup a basic samba client in Centos 7 Server.
I used a two systems as describe below:
Samba Server:

Samba Client:

STEPS
- Install Samba
Check for existing samba package installed in the server using the following commands:

If samba is installed, remove it using these commands:

After removing, install samba.

- Configuring fully accessed test share
Let’s configure a fully accessed share for users. We will name it test_share. Anyone can read or write in this share.
Create a directory called ‘/samba/test_share’ and set full permission. You can name this share as per your liking.

Edit samba configuration file:
Tip: You can install midnight commander for a clear and easy way to view or edit files.

Or simply use “nano” or “vi” command.


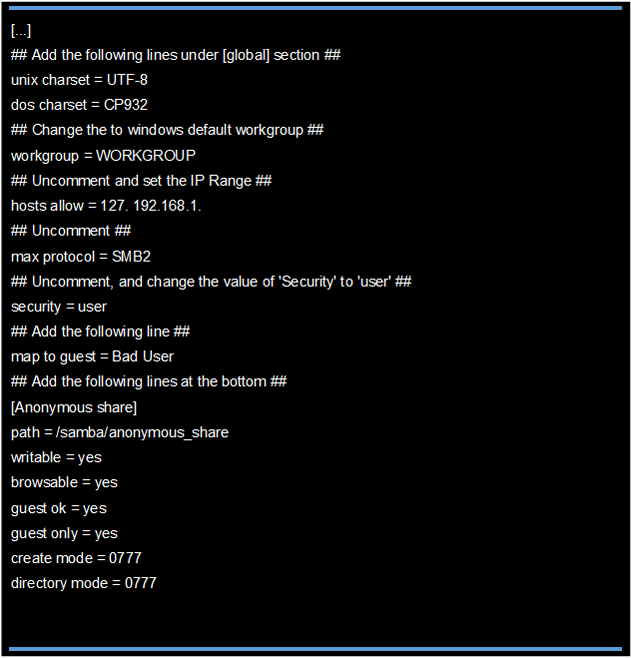
Find the following directives and make the changes below:

- Start samba services


If all runs well, you’re good for the next step.
- Firewall Configuration
Allow Samba server default ports through firewall.

Restart firewall to apply the changes.

- Selinux Configuration
Turn the samba_enable_home_dirs Boolean on if you want to share home directories via Samba.

If you create a new directory, such as a new top-level directory, label it with samba_share_t so that SELinux allows Samba to read and write to it. Do not label system directories, such as /etc/ and /home/, with samba_share_t, as such directories should already have an SELinux label.
If you don’t want to mess up with the SELinux, just disable it as shown below, and continue.
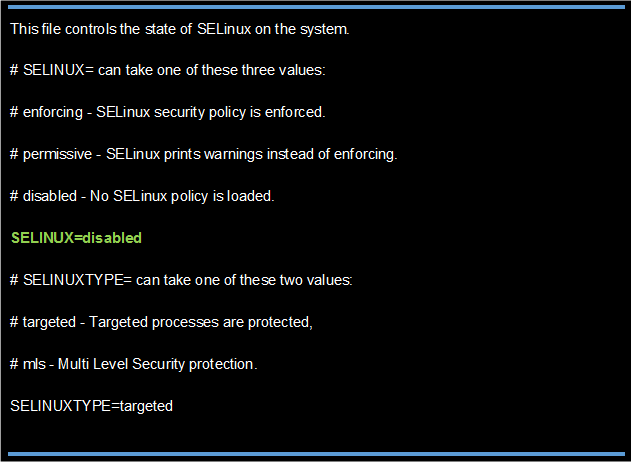
To disable SELinux, edit file at /etc/sysconfig/selinux

Set SELinux value to disabled.

Restart the server to take effect the changes.
- Test samba shares
Now, go to any windows client system. In this example, I am using Windows 10 system.
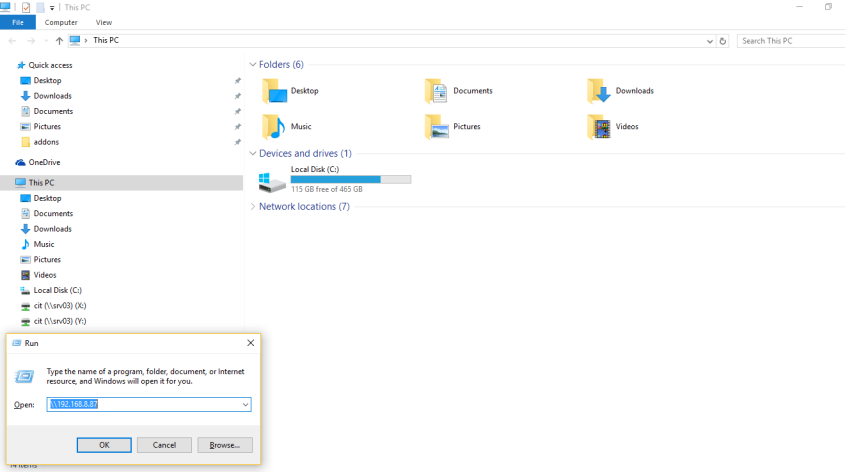
Press Ctrl + R. Enter the samba Server IP as shown below.

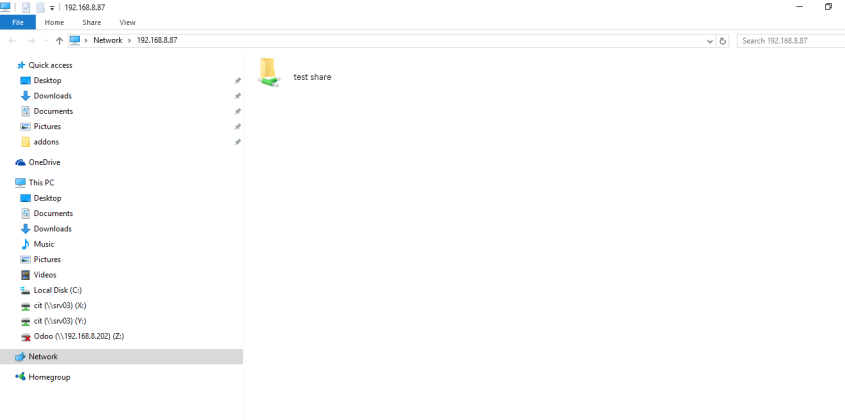
Now, you’ll be able to access the fully accessed samba shares.


